SmartSchool OS — AI-Powered School Operating SystemSmartSchool OS — AI-Powered School Operating System
FeaturesPricingAboutDocsSupport
LoginStart free
SmartSchool OS — AI-Powered School Operating SystemSmartSchool OS — AI-Powered School Operating System

One AI-powered operating system for school reports, exams, analytics, and growth — replacing spreadsheet chaos with clarity.

Start free

Product

  • Features
  • Pricing
  • Documentation

Resources

  • Get started
  • Support
  • About

Legal

  • Privacy Policy
  • Terms of Service

© 2026 SmartSchool OS. All rights reserved.

Powered by Globull

Documentation/Getting started

Quick-start guide

Go from zero to a fully configured school workspace in under 10 minutes. This guide walks you through every step.
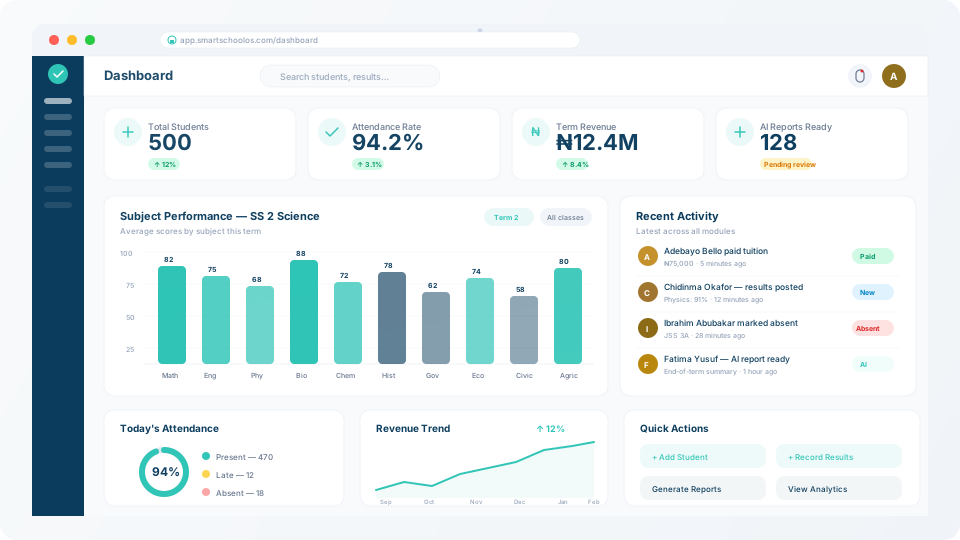
SmartSchool OS admin dashboard after setup

What you'll set up in this guide:

1. Create account
2. Configure workspace
3. Invite team
4. Enter first data

Step 1 — Create your account

Head to the signup page and create your free SmartSchool OS account. You'll need your school name, email address, and a password. The onboarding wizard launches immediately after signup.

  1. 1Click Start free on the homepage or navigate to /signup.
  2. 2Enter your school name, admin email, and choose a secure password.
  3. 3Verify your email — you'll receive a confirmation link within seconds.

💡 Tip

Your first 14 days include full access to all features — no credit card required.
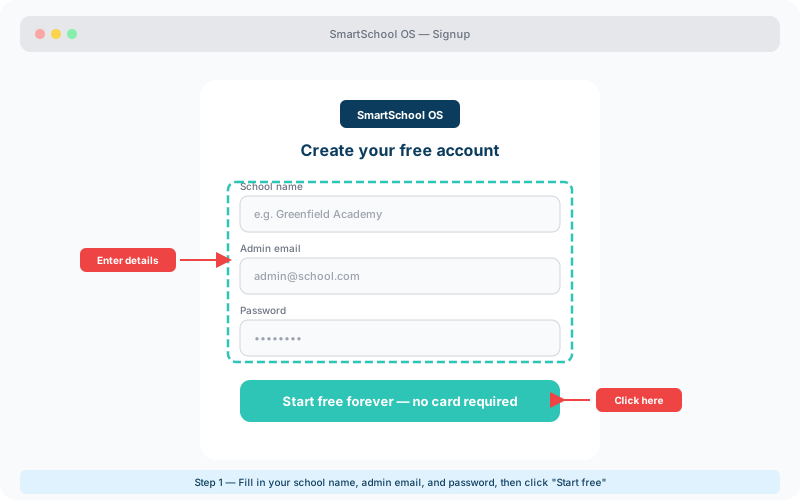
SmartSchool OS signup form with school name, email, and password fields highlighted
The signup screen — fill in your school name, admin email, and a secure password.

Step 2 — Set up your workspace

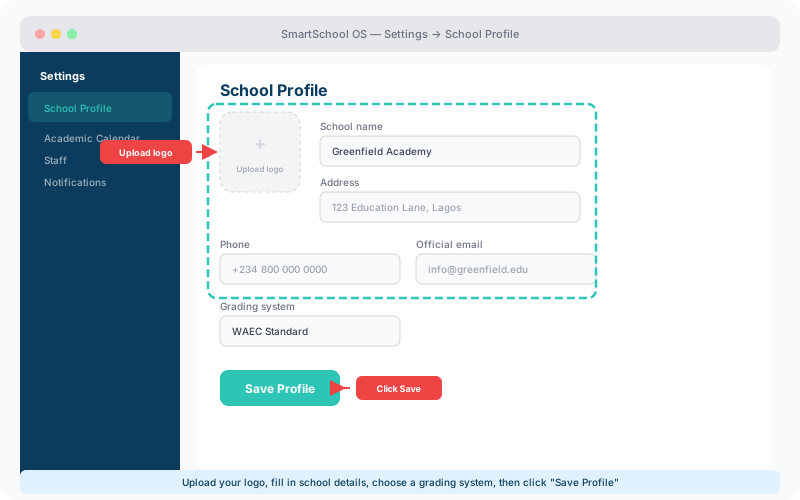
Once logged in, the setup wizard walks you through your school profile. Configure your logo, address, contact details, and academic calendar. This branding appears on report cards, parent notifications, and all exported documents.
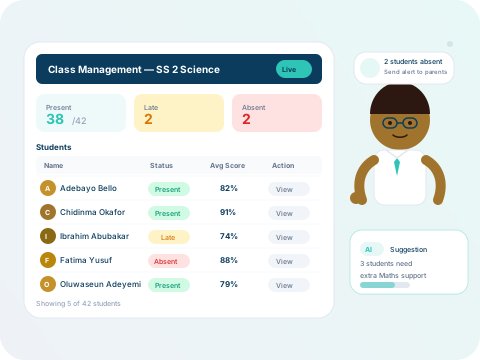
Teacher dashboard showing class management setup
School profile settings with logo upload, school name, address, and grading system fields highlighted
The workspace setup screen — upload your logo, enter school details, and choose your grading system.

Define your term structure (typically 3 terms per academic year in Nigerian schools), set term start/end dates, and configure your grading scale. SmartSchool OS supports WAEC, NECO, and custom grading systems out of the box.

Step 3 — Invite your team

Navigate to Settings → Staff → Invite and send email invitations. Each staff member gets a role that controls their access level:

Admin

Full access to billing, settings, and all modules

Teacher

Class management, score entry, and report tools

Viewer

Read-only access to dashboards and reports

⚠️ Note

Only Admins can manage billing and storage settings. Assign this role carefully.
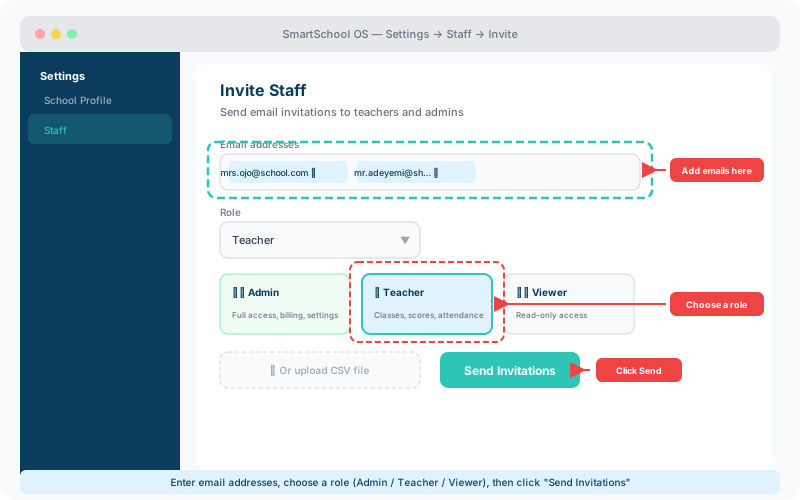
Staff invitation screen with email entry, role selection, and Send Invitations button highlighted
The invite screen — add email addresses, pick a role, then click Send Invitations.

Step 4 — Start entering data

Add your first students, create class groups, and configure your first exam period. The platform guides you through each step with inline help tooltips and progress indicators.

  1. 1Add students — individually or bulk upload via CSV/Excel.
  2. 2Create classes — assign students and link a form teacher.
  3. 3Set up exams — define your first assessment period and subjects.
  4. 4Mark attendance — teachers can start marking from day one.

What's next?

Your workspace is ready! Explore the detailed guides below to master each module:

Student enrolmentExam creationAI report generationDashboard overview
← Back to docsNext: Workspace setup →